Lawn Mowers


Can you jump start a lawnmower Using your Car Battery?

September 21st, 2017 ernie Posted in Lawn Mower Safety | No Comments »


Jump start a lawnmower

We recently received a question from a reader? Can you jump-start a lawnmower using your car battery? The answer is yes, with conditions! First of all, your lawnmower must have a battery and an electric start capability. This rules out many lawnmowers. Operators need to check the manual to be sure that this can be done. There should be instructions on how to proceed.

If you do not have a manual, find one online for your lawnmower. Your car’s battery is 12 volts, which means you can only connect to another battery that is 12 volts. Make sure your lawnmower battery is also 12 volts.

Can you jump-start a lawnmower Using your Car Battery

Once you have confirmed that both batteries are 12 volts, you can connect them using proper jumper cables. Always connect positive terminals together and negative terminals together. Never connect positive to negative.

Now that they are connected, your lawnmower battery will be charging. Try starting the engine. You should only crank the engine for 5 or 10 seconds at a time. More than that, it can damage the starter motor or the battery.

If the engine does not start, you may have more serious problems. Start by disconnecting the jumper cables. Then, check that there is gasoline in the fuel tank. Add if necessary.

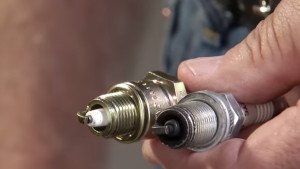
Next, check the spark plug. Remove it from the engine using appropriate tools. If it is corroded, either clean it up or replace it. Reset the gap to the manufacturer’s specifications.

Try restarting the engine using jumper cables if necessary. If it still does not start, you may have more serious problems and should consult a mechanic.

AddThis Social Bookmark Button

Underground Sprinkler Shopping List

September 7th, 2017 ernie Posted in Sprinkler Systems | No Comments »

Underground Sprinkler Shopping ListThe next step is to create your underground sprinkler shopping list of parts and supplies to install your underground sprinkler system. The plan you drew up will be the source of all the necessary information. If the plan is wrong or you make a mistake in transcribing the requirements, you may be short of parts or have the wrong parts. The following is a step-by-step approach to creating your shopping list.

Prepare your underground sprinkler shopping list.

Write the catalog number of each sprinkler head and valve on the plan. At each intersection or turn in the pipeline, write the fitting needed. Measure the number of feet of pipe needed. Now, make a shopping list, transferring items one at a time from the plan to the list. Include PVC cement. If you are using an automatic controller, add it to the list, along with enough wire and wire connectors to wire each valve to the controller.

To avoid costly problems, have your plan checked by a specialist before you begin. The retail dealer who supplies your equipment may offer help, in which case you can check it for free. Otherwise, it is money well spent to engage the services of an independent installer.


Save

AddThis Social Bookmark Button

Design rules for an underground sprinkler system

August 21st, 2017 ernie Posted in Sprinkler Systems | No Comments »

 Design rules for an underground sprinkler systemThis continues our last post about planning an underground sprinkler system. This post will cover some design rules for planning an underground sprinkler system for residential homes. Basic rules for a sprinkler system are essential to ensure proper lawn watering and a healthy lawn.

Design rules for an underground sprinkler system

Areas covered by one circuit must be watered together for watering needs.

Each circuit should use no more than 75% of the available flow rate. To determine each circuit’s flow rate, add the sprinkler heads’ flow rate as given in the catalog description.

Do not mix different types of sprinkler heads, e.g., impulse, spray, shrub bubblers, etc., on one circuit.

Take your time planning the circuits. It may take two or three tries to get it right.

Next, draw the pipe from the house water supply to the manifold. From there, draw in every valve to every head on the circuit. Plan to use the same trench for installing two or more waterlines whenever possible. Avoid going under walks or driveways or near trees. If you are using PVC or another rigid pipe, draw straight lines with right-angle turns, you can lay polyethylene pipe in curves.

Following these Design rules for an underground sprinkler system will make a massive difference in your success as a lawn gardener.

AddThis Social Bookmark Button

Planning an underground sprinkler system

August 7th, 2017 ernie Posted in Sprinkler Systems | No Comments »

Planning an underground sprinkler systemPlanning an underground sprinkler system involves several stages. To begin with, consumers should check to see if their locality requires a building permit. Next, check for underground utilities before digging. Find out if there are any local municipal watering ordinances and finally find out your state and local regulations requiring a licensed professional installation if any. Then begin planning an underground sprinkler system for your yard.

Planning an underground sprinkler system

Next you you must begin planning the layout of your underground sprinkler system. Drawing your plan on paper helps you to visualize your underground sprinkler system. A carefully prepared plan helps when ordering materials. It makes it easier to get advice from your garden center, irrigation specialist, or hardware dealer. It serves as a detailed record of where the pipelines are laid.

Begin planning an underground sprinkler system with graph paper, 10 grids to an inch is fine. Use a soft lead pencil, a dime store compass, and a measuring tape. Make your plan complete. A good plan is actually a Birdseye view of your property drawn to scale, preferably 1 inch equaling 20 feet. It should show shrubs, trees, paved areas, fences, mailboxes, raised planters, very drainage or powerlines, and other features that could affect the sprinkler design and installation. If significant, note prevailing wind direction, sun and shade areas, as well as high and low spots in your landscape.

Draw out the Plan

Draw the plan for both front and back yards, even if you plan to install The system in only one area. You may want a similar system in another area at a later date. If you want to include sprinklers for trees and shrubs, indicate any water-sensitive or especially thirsty plants on the plan.

Next, draw in the location of the sprinkler heads. Set your Compass to match the radius of the sprinkler head pattern, available from the manufactures catalog. Locate a quarter circle head in each corner of the lawn, set the compass point I need to head location, and draw a quarter circle to show the area covered by their head. Next, locate half-circle heads along the edges of the line. Space the head so that their spray pattern overlap at least 60%. If you live in a window area, overlap them 100%, so that the spray from each head touches joining heads. Finally, fill in the center area to the line with full circle heads.

It is all right to overlap spray patterns more than is needed to make everything fit but do not space heads too far apart. If one section of the lawn receives less water than the rest, it will die from under-watering unless you could water it by hand.

Once you have located the heads, draw light circles around those that are to be in the same circuit, and follow these rules with arranging the circuits.


AddThis Social Bookmark Button

Valves and Circuits

July 21st, 2017 ernie Posted in Sprinkler Systems | No Comments »

Valves and CircuitsThe manifold is the control unit of the sprinkler system. It is composed of a group of control valves that deliver water to different parts of the lawn. Position it in a convenient spot, where you can turn it on and off without getting wet. Try to conceal it with a cover or box, since the plumbing is seldom attractive. One manifold each is needed for a front lawn and another is needed for the back lawn. Together they are referred to as valves and circuits.  It should also be placed in a position that is secure and cannot easily be tampered with. You might consider placing the manifold at the side of the house inside the perimeter fence that surrounds your yard for example.

Valves and Circuits

The control valves that make up the manifold are usually globe valves. They are the same type of valves used for faucets in the house. The globe valve shut off the flow of water by pressing a soft disc against a smooth valve seat.

Control valves often have anti-siphon valves attached to them. Anti-siphon valves, also known as vacuum breakers, prevent the backflow of water into the housing supply. As a result, they are sometimes required by local ordinances and are always a good idea to include.

Each control valve controls several sprinkler heads. This group of sprinkler heads is called a circuit. Two factors control the number of circuses you need. What is the available flow rate? If too many sprinklers are turned on at one time, the water pressure drops, preventing the heads from throwing as far as they are supposed to. For proper coverage, it is best to turn on one circuit at a time.

The other factor to consider is the watering needs of different areas. For example, if a shrub bed is on the same circuit as the lawn, the shrub bed will be watered as often as the lawn, even though it does not need as much water.

AddThis Social Bookmark Button

Sprinkler Heads and Risers

July 7th, 2017 ernie Posted in Sprinkler Systems | No Comments »

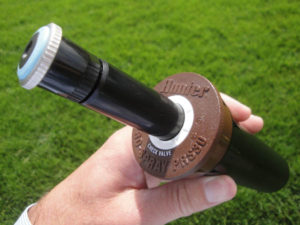
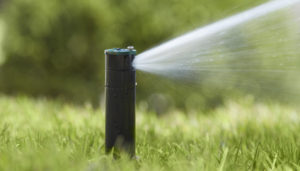
Although a wide variety of sprinkler heads is available for every conceivable application, most residential homes are best served by adjustable, pop-up sprinkler heads and risers with full. half circle, and quarter circle watering patterns. When not in use, the head rests flush on the ground, out of the way of the mower and foot traffic. Each sprinkler head discharges a specific number of gallons per minute over a given radius, and each requires a certain water pressure in order to achieve its designed throw.

Sprinkler Heads and Risers

Most sprinkler heads have a flow control to adjust how far the water is thrown. Heads set for a specific arc are the most popular, such as three-quarter, 30°, and 60° arc. Heads with adjustable arcs are hard to find and expensive. If you do buy a head with an adjustable arc, check the specifications to make sure that this feature does not drastically affect the throw rate. This could change your watering strategy.

Sprinkler heads with a square pattern and a low precipitation rate are also available. A square pattern is useful in narrow areas such as side yards and in parking strips. Use low precipitation ahead where runoff is a problem due to sloping grade or clay soil.

Whenever possible, group sprinkler heads by the requirements of an area. Besides pop-up spray heads, impulse sprinklers are useful for watering large areas. However, they are difficult to use efficiently for smaller ones. If wind is a problem, place a pop-up sprinkler with rotary action in the center of a lawn area. It will disperse water evenly in large drops rather than a spray.

Risers

Risers bring the water from the underground pipe to the sprinkler heads. The height of the risers must be carefully adjusted. Several types of risers are available to make this adjustment easier. Cutaway risers have sections of thread in short increments along their length. It is easy to cut away small 1/2-inch pieces, one or two at a time until the proper height is reached. Flexible risers also require proper height adjustment, but if the sprinkler head is accidentally kicked or hit by a lawn mower, the risers flex rather than break.

AddThis Social Bookmark Button

Flow Rate Underground Sprinkler System

June 21st, 2017 ernie Posted in Sprinkler Systems | No Comments »

One of the most important aspects of installing a sprinkler system successfully is determining the available flow rate: the rate at which water travels through a pipe, measured in gallons per minute. The easiest way to find the available gallons per minute is by using a special gauge. Many sprinkler suppliers will loan this gauge on request.

Another way to deduce the available gallons per minute is to measure how many seconds it takes an outdoor faucet, turned wide open, just to fill a 1-gallon container. Dividing the total number of seconds into 60 gives you the flow rate in gallons per minute.

Flow Rate and Piping

For most sprinkler systems, galvanized steel and copper pipes have gradually given way to lightweight PVC pipes and flexible polyethylene pipes.

Ease of handling, assembly, durability, flow characteristics, cost, and availability for all reasons for recommending PVC pipe in solvent weld fittings as the piping for sprinkler installations. Use the heavy-duty schedule 40 for all pressure-holding lines. To save money and materials used class 200 or class 315 pipe for lateral Lines that will never be required to hold constant pressure.

The less expensive but less substantial substitute for PVC pipe is flexible polyethylene pipe. It comes in 100-foot and 100-hundred-foot rolls and can be cut with a knife. Fittings are inserted into the pipe and held in place with stainless steel clamps tightened with a screwdriver or wrench. The advantage of polyethylene pipe is that it does not restrict you from following straight lines. However, this pliability is a disadvantage as well. You can cut through it with a spade while digging in your garden without being aware of it. Rodents, especially gophers, like to chew holes in it. And it cannot handle enough pressure for it to be used between the water meter and the control valves.

In general, unless you have a large lawn, the three-quarter-inch pipe is sufficient for the entire system. If water needs to travel more than 100 feet, the friction of water through the three-quarter-inch pipe may reduce the available gallons per minute. Use a 1-inch pipe for distances over 100 feet to avoid this occurrence.

Our next post will talk about sprinkler heads and risers.

Save

Save

AddThis Social Bookmark Button

Installing Underground Sprinkler Systems

June 7th, 2017 ernie Posted in Sprinkler Systems | No Comments »

Installing Underground Sprinkler SystemsAfter you have decided to Installing Underground Sprinkler Systems? You need to decide how much, if any, of the work you’re going to do yourself. Companies specializing in here in irrigation get can often install a system within a few days. Doing it yourself may take several weekends. If the sprinklers need to be installed before planting a new lawn, The clutter of materials and equipment may not be important. In an established lawn, however, it may be bothersome, even damaging. Cost is also a consideration. If you are handy with tools and have the time, it is much less expensive to do it yourself.

Installing Underground Sprinkler Systems – Choosing a system

Once you decide who is doing the work, be sure to choose the manufacturer as well as the supplier carefully. Consult neighbors who have underground systems. Ask irrigation specialists,  nursery workers, or your real estate agent for advice about the trade name that best suits your needs. Then either write the manufacturer or see your local distributor obtain detailed information. If you are installing the system yourself, before purchasing it read the installation instructions. Make sure they are easy to follow.

Note that if you live in a cold climate where it gets below freezing in the winter, you will need to drain the pipes of all water and seal them. Water freezing in the lines will rupture the pipes and make them useless for the next season. If you are uncomfortable doing this work yourself arrange for a maintenance contract to close the system in the fall and re-open it in the spring. Underground sprinklers are a great way to ensure that your lawn gets enough water and all areas of the lawn are covered.

Our next post will discuss Flow Rate and piping.

AddThis Social Bookmark Button

Lawn Mower Spring Maintenance

May 21st, 2017 ernie Posted in Maintenance | No Comments »

Lawn Mower Spring Maintenance Now is the time to complete Lawn Mower Spring Maintenance and also the annual maintenance on your snow blower at the same time. Doing both machines at the same time saves time and you only need to get dirty one time. Change the oil in both machines, check the spark plugs, make sure the cutting blade is sharp and complete any other repairs that are needed on your lawn mower and snow blower. Grease the auger, check the belt tension and review the belts for any wear and tear. All of this work can be accomplished in a few hours and save you hundreds of dollars later on in repair costs, frustration, or worse buying a new machine.

Lawn Mower Spring Maintenance

In summary, lawnmowers are pretty easy to maintain. Change the oil once a year minimum. In the fall drain all of the fuel out of the gas tank and carburetor. Alternatively, you can just let the engine run until all of the gasoline is burned off.

Also, check the spark plug to make sure it is properly gaped and also clean from deposits. If your spark plug is not in good shape, the engine may run rough or not at all. If it looks bad, replace the spark plug with a new one after properly setting the gap.

An hour’s work will make sure that your lawn mower runs well for many years. These checks are easy to do and most do it yourself consumers can handle this job easily.

Save

AddThis Social Bookmark Button

Lawn Mower Annual Spring Maintenance Tips

May 7th, 2017 ernie Posted in Maintenance | No Comments »

Lawn Mower Annual Spring Maintenance TipsMany homeowners don’t bother with lawnmower annual spring maintenance. They just pull their lawnmower out of the garage, add some fuel to the tank and pull on the starter cord. In most cases, after a few pulls on the starter chord the engine coughs and starts. It may run rough for a little while, but then once new gasoline gets into the engine it smooths out and runs well. You might even get away with this for several years. Eventually, the engine will not start at all and will require a complete overhaul. The engine oil is black. The carburetor is gummed up. If you want many years of use from your lawnmower, complete a lawn mower annual spring maintenance every year.

Lawn Mower Annual Spring Maintenance Tips

Here are a few spring maintenance tips that will help to keep your lawn mower running for many years.

  • Change the oil once every year or more often if you have a very large lawn
  • Dispose of the oil properly
  • Change or clean the spark plug
  • Put new gasoline in the gasoline tank
  • Disconnect the spark plug wire, then check the blade to determine if it needs sharpening
  • Perform repairs that might be needed

Save

AddThis Social Bookmark Button

What will a bad Spark Plug do for a Lawn Mower

April 21st, 2017 ernie Posted in Maintenance | No Comments »

What will a bad Spark Plug do for a Lawn MowerWondering what will a bad spark plug do for a lawn mower engine? It will make it difficult to start at the very least. It may cause the engine to run roughly. A bad plug may cause the engine to burn more fuel than normal and spew more noxious exhaust. Finally, it just may not start at all. Leaving you to wonder how to get your grass cut and who is going to repair your lawn mower. There may be a number of things wrong with your lawn mower engine. However, checking your engine’s spark plug is one of the easier things to do.

What will a bad Spark Plug do for a Lawn Mower – Clean or Replace

The simplest thing to do is to replace the spark plug with a new one after properly setting the gap on the center post. Replacing the spark plug will ensure that there is no soot or deposits that might be inhibiting the spark that is needed to ignite the gasoline in the combustion chamber.

You can also clean the existing spark plug. You will need to use a wire brush to remove all deposits from the spark plug. Use a bit of sand paper to clean the end of the center post and the rest of the surrounding area. Make sure there are no carbon deposits that are adhering to any metal parts. Reset the gap according to the manufacturer’s instructions. Reinstall the plug and test the engine by starting it to see if this makes a difference.

If not you may have other issues that need to be addressed. There could be a bad gasoline filter or a gummed-up carburetor from old gas sitting too long in the gas tank. You will need to get these cleaned and re-calibrated for your engine to run smoothly.

AddThis Social Bookmark Button

Can bad spark plug affect Lawn Mower

April 7th, 2017 ernie Posted in Maintenance | No Comments »

can bad spark plug affectSpring is a great time to tune up your lawn mower and get it ready for the coming season. We get questions from readers such as, can bad spark plug affect lawn mower engines? The answer is definitely yes. An engine with a dirty spark plug can be difficult to start. When you finally get it running, the engine may run poorly and shut off often. There can be a number of reasons this is happening, but one for sure is a bad spark plug. What do we mean by a bad spark plug? It is dirty around the electrode with lots of carbon deposits and the porcelain may even be pitted. All of these things will impede the spark that ignites the gasoline oxygen mixture in the cylinder causing a rough running engine. It may not even start and if it does emits sooty exhaust smoke.

Can bad spark plug affect Lawn Mower – Repairs

If you have this problem, the easiest thing to do is to remove the spark plug and clean it up. Remove all of the dirt and grime along with any carbon deposits. Once it is clean and spotless, reset the gap according to the manufacturers specifications.

You can test your spark plug by reattaching the spark plug wire to the plug. Hold the spark plug against the metal housing of the engine to ground it and crank the engine several times to generate a spark. If you do not see a spark you may not have grounded it properly or there is something additionally wrong with the spark generation system.

You may need to investigate further, but at least you know that the spark plug has been cleaned and / or replaced.

AddThis Social Bookmark Button

Underground sprinkler systems

March 28th, 2017 ernie Posted in Watering | No Comments »

Underground sprinkler systemsInterest in underground sprinkler systems increases every year. An underground system has many advantages over a portable sprinkler system. The most obvious is the convenience of not having to constantly move it. Most underground systems are also more efficient than portable types. All areas receive the same amount of coverage.

Sprinkler heads apply predictable amounts of water over an exact area. This eliminates the most objectionable grievance pf portable sprinklers, even water distribution. An underground system combined with an automatic timer can even water your lawn while you’re away from home.

Underground sprinkler systems

Before deciding to install an underground end to end system, consider the initial cost of materials and the labor involved in installing it. Because of the increased popularity of such systems, manufactures now produce illustrated easy to follow directions for homeowners who do the work themselves. Materials have also become easier to install and less expensive.

Home owners living in cold climates that have below freezing temperatures in the winter, must also design their system for easy drainage. Drain water from the system for the winter. Any water left in the lines can freeze and potentially crack the pipes.

Keep in mind, however, that a poorly designed or poorly installed underground system can be as bad as or worse than a portable sprinkler. Our next post will cover typical installation considerations, potential problems and how they can be solved.

AddThis Social Bookmark Button

Types of Sprinkler Systems

March 7th, 2017 ernie Posted in Watering | No Comments »

Types of Sprinkler SystemsThere are many different types of sprinkler systems. Stationary sprinklers deliver water in an irregular pattern. The accumulation of water in the containers may vary from 8 inches an hour in one spot, to 2 inches an hour just four feet away. It may be almost nothing near the sprinkler head. There is no predictable pattern that leads to proper overlapping and efficient watering. However, it is unfair to label the sprinkler useless. As long as you know how it distributes water, it can be valuable for spot watering, or supplementing other types of sprinklers.

Oscillating arms sprinklers deliver water in a rectangular pattern. Many observers believe that this type of sprinkler deposits most of the water near the sprinkler head. With increasing amounts toward the periphery is the arm moves away from the vertical central position. Well this is true of older models, newer versions stall momentarily when the arm is furthest from its upright position, thus evening out distribution at the periphery.

Types of Sprinkler Systems

The whirling head sprinkler deposits the largest amount of water close to the sprinkler head. The amount decreases the further away it goes from the source of the spray. Water distribution is uneven when the sprinkler is used without a system of overlapping. With a 50% overlap, efficiency increases and the sprinkler becomes quite useful.

Impulse sprinklers are best for large areas and are commonly used for golf course lawns. And internal jet rotates the sprinkler, which delivers pulses of water covering anywhere from a full circle to a part circle. Coverage to your lawn is quite even.

By combining the knowledge gained from experimentation and observant eye, it is quite easy to set up the watering schedule for your lawn with a portable sprinkler.

AddThis Social Bookmark Button

Measuring water sprinkler delivery to your lawn

February 21st, 2017 ernie Posted in Watering | No Comments »

Measuring water sprinkler delivery to your lawnMeasuring water sprinkler delivery to your lawn is quite easy. Set up a grid-like pattern of small containers of the same size on a section of the lawn. Even though different types of sprinklers require different grid patterns, it is a good idea to start with a straight line of containers, extending them at set intervals. You want to start from close to the sprinkler Head to just outside the reach of the water.

Measuring water sprinkler delivery to your lawn

Turn the sprinkler on at the normal operating pressure. Leave it on for a set period of time. Then record the amount of water deposited into each container. This gives you a good idea of the sprinkler pattern, as well as the amount of water distributed.

Realizing that the lawn generally needs 1 to 2 inches of water per week, the container test is an easy method to follow. It helps you determine how long to turn on the sprinkler and to what degree to overlap the sprinkling pattern for efficient watering.

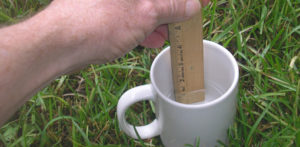
As you can see from the picture you can use any kind of container that you would like. The important thing is to keep them all the same size and then measure accurately with a ruler or tape measure. If you let the sprinkler run for 30 minutes, and then take your measurements you will be able to figure out how long you need to water to deliver 1 inch to 2 inches of water per week.

AddThis Social Bookmark Button

Laying sod in the cold weather not outrageous

February 7th, 2017 ernie Posted in Landscaping | No Comments »

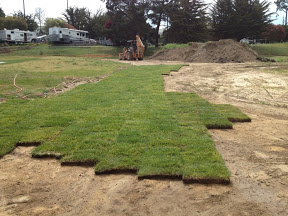
Laying sod in the cold weather not outrageousCan you lay sod in cold weather? What if there is snow on the ground already? It turns out that laying sod in the cold weather not outrageous at all. Cold is not the enemy. Rather it is heat and lack of water that can be the enemy of newly laid sod. Heat will dry out newly laid sod quickly, especially in hot dry weather. If you do not water the sod, the roots are going to quickly dry out and die. With no nourishment or moisture the grass quickly dries out, turns brown and dies. In cold weather, not freezing or frozen weather it can survive and even slowly put down roots into the soil below.

Laying sod in the cold weather not outrageous

The ideal time to lay sod is typically late summer or fall. A piece of sod laid down in November, rolled will survive quite well through the winter. It will defrost in the spring and everything is going to be fine. It is heat that destroys of sod, not the cold. The newly laid sod should take root. So there’s nothing to worry about, your dollars are not being wasted.

Keep and eye on it in the spring. If you have a really dry winter, with limited or no snow, you may need to water the sod as soon as the ground thaws. Following standard watering methods otherwise.

AddThis Social Bookmark Button

Watering Efficiently New Lawns

January 21st, 2017 ernie Posted in Watering | No Comments »

watering efficiently new lawnsWatering efficiently new lawns involves a special set of rules for newly seeded lawns or newly sodded lawns. Sprinkling is, at the least, an everyday requirement. For seeds to germinate or sod roots to nit, watering is often required more than once a day. This is especially true if you are in a dry climate, or are experiencing drought conditions. Watering efficiently new lawns in these conditions will avoid the new sod from turning brown and dying. But what do you do when it comes to existing lawns? How often and for how long should you water?

Watering Efficiently New Lawns

Besides watering more deeply and less frequently, you can increase watering efficiency by improving other cultural practices. Two major problems that result in poor water penetration are thatch and compacted soil. If the problems are bad enough, either can actually repel water, causing wasteful runoff. Regular D thatching and aerating can increase water penetration, Provide air in the root zone, and aid in nutrient simulation.

You can conserve water by following recommended mowing heights and by adding fertilizers that are high in potassium and low in nitrogen before hot weather arrives.

Fertilizing properly is an important factor in efficient watering. Under-fertilizing invites competition from water-hungry weeds and reduces the capacity of the lawn for wear and tear. Over-fertilizing can be just as damaging. It promotes vigorous, water and regrowth of the lawn, which causes thatch to develop and reduces the ability of a cool season grass to recover from summer dormancy.

AddThis Social Bookmark Button

Watering during a Drought

January 7th, 2017 ernie Posted in Watering | No Comments »

Watering during a DroughtWhen drought conditions exist, a lawn slows its growth, becomes wilted and brown, and may die. If you live in an area where water conservation is requested or enforced, you simply have to hope that your lawn survives the stress. If it dies, replant with a more drought-tolerant grass when suitable weather returns. During times of drought, lawns that are under a system of survival watering still develop a spotty thin appearance. watering during a drought will help your lawn survive.

Here are some basic watering rules in case your area experiences a drought:

Watering during a Drought

  • Do not apply nitrogen fertilizer to lawns when drought conditions exist.
  • Mow your grass higher and less often. However, do not let it grow more than twice the recommended mowing height.
  • Reduce weed competition.
  • Irrigate without runoff to root zone depth (6 to 8 inches ) when you’re lawn shows the need.

There is a difference between a drought-stressed brown lawn and a dormant brown lawn. Cool season grasses, such as Kentucky bluegrass or fescue, become dormant in the hottest part of the summer, returning to full vigor in the cooler fall weather. If water is abundant and you started an effective watering program the previous spring, it is possible to keep your cool season lawn green during this dormant period. By continuing to water throughout the summer. However, if the lawn becomes dormant, let it stay that way. Too many fluctuations between dormancy and active growth can weaken a lawn.

Check with the local weather bureau for climate information. It should be helpful in setting up your specific watering program. Rain gauges are also a useful tool. By knowing how much rain falls, you can tell how much supplemental water you need. Do not be misled by light drizzles that supply little moisture to the soil. However, watering after a light shower can be an effective way of reducing water loss through evaporation.

If drought is a recurring problem, you may want to plant a more drought-resistant lawn.

AddThis Social Bookmark Button

Garden Hose Buying Tips

December 21st, 2016 ernie Posted in General | No Comments »

garden hose buying tips Most gardeners realize the importance of a hose. Improper use or a hose of poor quality can be annoying and harmful. Does your hose have leaky connections? Is it too short? Is it impossible to roll up? Are the edges of its metal couplings sharp and jagged? Garden hose buying tips should take these factors into account.

If you answered yes to any of these questions, you probably need to make minor repairs or purchase a new hose. Making a repair is usually easy and inexpensive. If you decide to buy a new hose, it is worth paying more for one of high-quality that will provide excellent service for a long time.

Garden Hose Buying Tips

A well-made hose is flexible in any weather. This is usually the case with hoses made of high-grade rubber and laminated filament. It is seldom true of the inexpensive plastic models. The hose you buy should be long enough to reach to all areas of your yard, and should have a wide enough diameter to supply sufficient quantities of water. The larger the diameter of the hose, The more water it can deliver. Garden hoses are available in three-quarter inch, five eights inch, and 1/2 inch diameters. A hose that is five eights inch in diameter is the usual choice for a medium size lawn.

If your hose needs repair, you’ll find a wide variety of hose repair equipment, as either clamp on or screw on connections. Our favorite is the brass screw on type featured in many stores.

If you have ever damage plants while dragging the hose from one area to another, consider placing heavy wooden stakes as barriers in key areas of the garden.

AddThis Social Bookmark Button

Lawn watering tips

December 7th, 2016 ernie Posted in Lawn Care | No Comments »

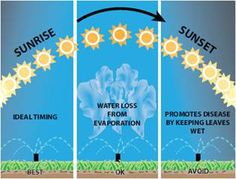
Lawn watering tipsLawn watering tips and general guidelines depend on the type of lawn, location, and rainfall. We will provide some general guidelines to follow in this post. For specific details use common sense and discuss with your local garden supply store. They will be able to give much more specific advice. Advice that will take into account the type of grass and the location you live in. The chart on the left indicates the best times to water your lawn for maximum results. The best time to water is early in the morning to avoid high evaporation and also promote disease.  During the day you get high evaporation. At night, damp lawns are more susceptible to mold and disease.

Lawn watering tips

How often to water – During dry periods, you may need to water once a week. if you live in the desert, you may need to water every day to avoid your grass drying out. If you receive an all-day rain once a week on average, you may never need to water.

When to water – As discussed above, the best time to water is early in the morning. This will minimize evaporation and also mold formation on the lawn.

How much to water – If you water once a week, your lawn should receive an inch of water. You can leave a small can or glass on the lawn. once there is an inch of water in the can, you have provided enough water. Too little water causes the roots to grow near the surface making them more susceptible in dry periods. Deep watering promotes root growth making your lawn stronger and able to withstand dry periods.

AddThis Social Bookmark Button


?>


Web Content Development